Side squats are a variation of the traditional squat exercise that targets different muscles in your lower body. This exercise involves moving your legs laterally, which helps to engage your glutes, quads, and inner thighs. In this article, we will discuss the muscles worked during side squats, how to perform the exercise, and some tips to help you get the most out of this movement.
Muscles Worked During Side Squats

Side squats are a great exercise for targeting your glutes, or your butt muscles. This is because the lateral movement of your legs helps to activate the gluteus medius and minimus muscles, which are often neglected during traditional squats. Additionally, side squats also work your quads, or the muscles on the front of your thighs. This is because you are still performing a squatting motion, which requires your quads to work to support your body weight.

Another muscle group that is worked during side squats is your inner thighs. This is because when you move your legs laterally, you are engaging your adductor muscles, which are located on the inside of your thighs. These muscles help to stabilize your legs and support your body during the exercise. Therefore, side squats are a great exercise for toning and strengthening your inner thighs.
How To Perform Side Squats

To perform side squats, stand with your feet shoulder-width apart and your toes pointing forward. Take a wide step to the side with your right foot, keeping your left foot in place. Squat down as far as you can, bending your right knee and keeping your left leg straight. Keep your chest up and your core engaged throughout the movement. Push through your right foot to return to the starting position, then repeat on the other side.

It's important to maintain proper form during side squats to avoid injury and get the most out of the exercise. Keep your knees in line with your toes and avoid letting them collapse inward. Additionally, make sure to keep your hips level and avoid leaning to one side or the other. You can add dumbbells or a barbell to increase the resistance of the exercise.
Tips For Getting The Most Out Of Side Squats

Here are some tips to help you get the most out of your side squats:
- Start with bodyweight squats before adding resistance to perfect your form.
- Keep your core engaged throughout the exercise to maintain stability.
- Focus on pushing through your heels to engage your glutes.
- Breathe in as you lower your body and exhale as you push back up.
- Don't let your knees collapse inward or lean to one side.
Conclusion
Side squats are a great exercise for targeting your glutes, quads, and inner thighs. By moving your legs laterally, you engage different muscles than you would during traditional squats, making this exercise a great addition to your lower body workout routine. Remember to maintain proper form and start with bodyweight squats before adding resistance to avoid injury and get the most out of the exercise.
Related video of Side Squats Muscles Worked

Looking for a killer core workout that will leave your abs burning? Look no further than hanging weighted leg raises. This challenging exercise targets your lower abs, hip flexors, and obliques, helping you build a strong and defined midsection.
How to Do Hanging Weighted Leg Raises
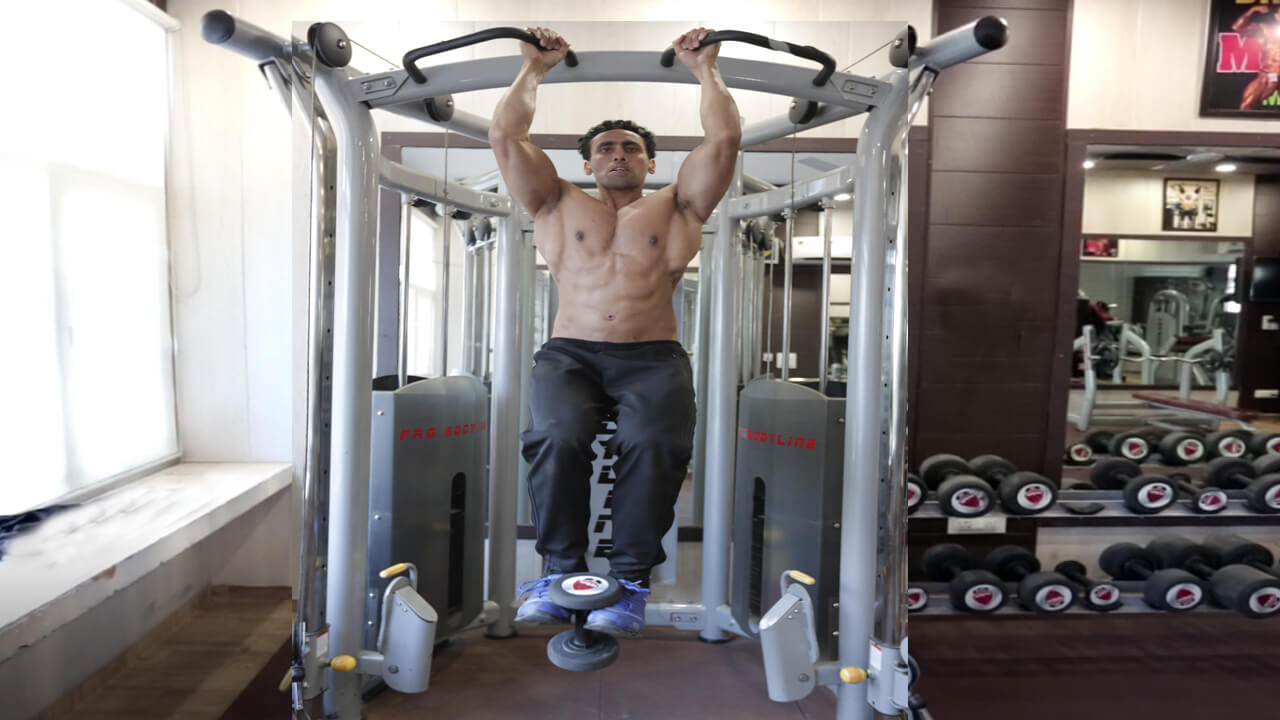
To perform hanging weighted leg raises, you'll need a pull-up bar and a weight plate or dumbbell. Here's how to do it:
- Hang from the pull-up bar with your arms fully extended and your feet off the ground.
- Hold the weight plate or dumbbell between your feet, squeezing your legs together to keep it in place.
- Keeping your legs straight, raise them up until they are parallel to the floor.
- Lower your legs back down to the starting position, keeping them under control the entire time.
- Repeat for 8-12 reps.
Variations of Hanging Weighted Leg Raises

Once you've mastered the basic hanging weighted leg raise, there are several variations you can try to keep your core workouts challenging and interesting:
- Knee Raises: Instead of raising your legs straight out in front of you, bend your knees and bring them up toward your chest.
- Side Raises: Instead of raising your legs straight out in front of you, raise them out to the side to target your obliques.
- Weighted Knee Raises: Hold the weight plate or dumbbell between your knees instead of your feet.
Tips for Maximizing Your Hanging Weighted Leg Raises

Ready to take your hanging weighted leg raises to the next level? Keep these tips in mind:
- Engage your core: Throughout the exercise, focus on squeezing your abs and keeping your core tight.
- Control your movement: Don't swing or use momentum to lift your legs. Instead, focus on slow and controlled movements.
- Start with light weights: If you're new to hanging weighted leg raises, start with a light weight to ensure you can maintain proper form.
- Gradually increase weight: As you get stronger, gradually increase the weight you're using to keep the exercise challenging.
- Combine with other core exercises: Hanging weighted leg raises are just one exercise in a well-rounded core workout. Combine them with other moves like planks and crunches for a complete routine.
Incorporating Hanging Weighted Leg Raises into Your Workout

So, how often should you be doing hanging weighted leg raises? It depends on your fitness goals and overall workout routine. However, as a general guideline, aim to incorporate them into your workouts 1-2 times per week.
Here's an example of how you might incorporate hanging weighted leg raises into a full-body workout:
- Warm-up: 5-10 minutes of light cardio (e.g. jogging, jumping jacks, etc.)
- Strength training: 3 sets of hanging weighted leg raises (8-12 reps), followed by 3 sets of squats, bench presses, and rows.
- Cardio: 20-30 minutes of moderate-intensity cardio (e.g. cycling, running, etc.)
- Cool-down: 5-10 minutes of stretching
The Benefits of Hanging Weighted Leg Raises

Incorporating hanging weighted leg raises into your workout routine can offer a host of benefits, including:
- Improved core strength: Hanging weighted leg raises target your abs, hip flexors, and obliques, helping you build a strong and defined midsection.
- Better posture: By strengthening your core, you can improve your overall posture and reduce the risk of back pain or injury.
- Increased flexibility: As you perform hanging weighted leg raises, you'll be stretching your hip flexors and hamstrings, improving your overall flexibility.
- Burn calories: As with any challenging exercise, hanging weighted leg raises can help you burn calories and improve your overall fitness.
Conclusion
Hanging weighted leg raises are a challenging but effective exercise for anyone looking to build a strong and defined core. By incorporating them into your workout routine and following the tips outlined above, you can take your core workouts to the next level and achieve your fitness goals in no time.
Related video of Hanging Weighted Leg Raises: The Ultimate Core Workout

Introduction
Building strong shoulders is essential for both men and women who want to achieve a well-rounded physique. One of the most effective exercises for developing the rear deltoids is the rear delt dumbbell rows. This exercise targets the back of the shoulders, helping to improve posture and prevent injuries.
How to Perform Rear Delt Dumbbell Rows

To perform rear delt dumbbell rows:
- Stand with your feet shoulder-width apart, holding a dumbbell in each hand.
- Bend your knees slightly and hinge forward from your waist, keeping your back straight.
- Engage your shoulder blades and lift the dumbbells up to your chest, keeping your elbows close to your body.
- Lower the dumbbells back down to starting position.
- Repeat for 3 sets of 10-12 reps.
Benefits of Rear Delt Dumbbell Rows
In addition to building strong shoulders, rear delt dumbbell rows offer several other benefits:
- Improved posture: Strong rear deltoids help to pull your shoulders back, improving your posture and reducing the risk of back pain.
- Reduced risk of injury: Strengthening your shoulders can help to prevent injuries when performing daily activities, such as lifting heavy objects.
- Increased upper body strength: By targeting the back of the shoulders, rear delt dumbbell rows can help to improve overall upper body strength.
Variations of Rear Delt Dumbbell Rows

To add variety to your workout, try these variations of rear delt dumbbell rows:
- Single-arm dumbbell row: Perform the exercise with one arm at a time, alternating between sides.
- Bent-over dumbbell row: Perform the exercise while bent over at a 45-degree angle, using a heavier weight than you would for the standing version.
- Cable rear delt row: Use a cable machine instead of dumbbells to add resistance to the exercise.
Tips for Performing Rear Delt Dumbbell Rows

Follow these tips to maximize the effectiveness of rear delt dumbbell rows:
- Focus on engaging your shoulder blades throughout the exercise.
- Keep your elbows close to your body to target the rear deltoids.
- Breathe out as you lift the dumbbells and breathe in as you lower them.
- Start with a light weight and gradually increase as you build strength.
- Perform the exercise in front of a mirror to ensure proper form.
Conclusion
Rear delt dumbbell rows are an effective exercise for building strong shoulders and improving overall upper body strength. By incorporating variations and following proper form tips, you can maximize the benefits of this exercise and achieve a well-rounded physique.
Related video of Rear Delt Dumbbell Rows: How to Build Strong Shoulders
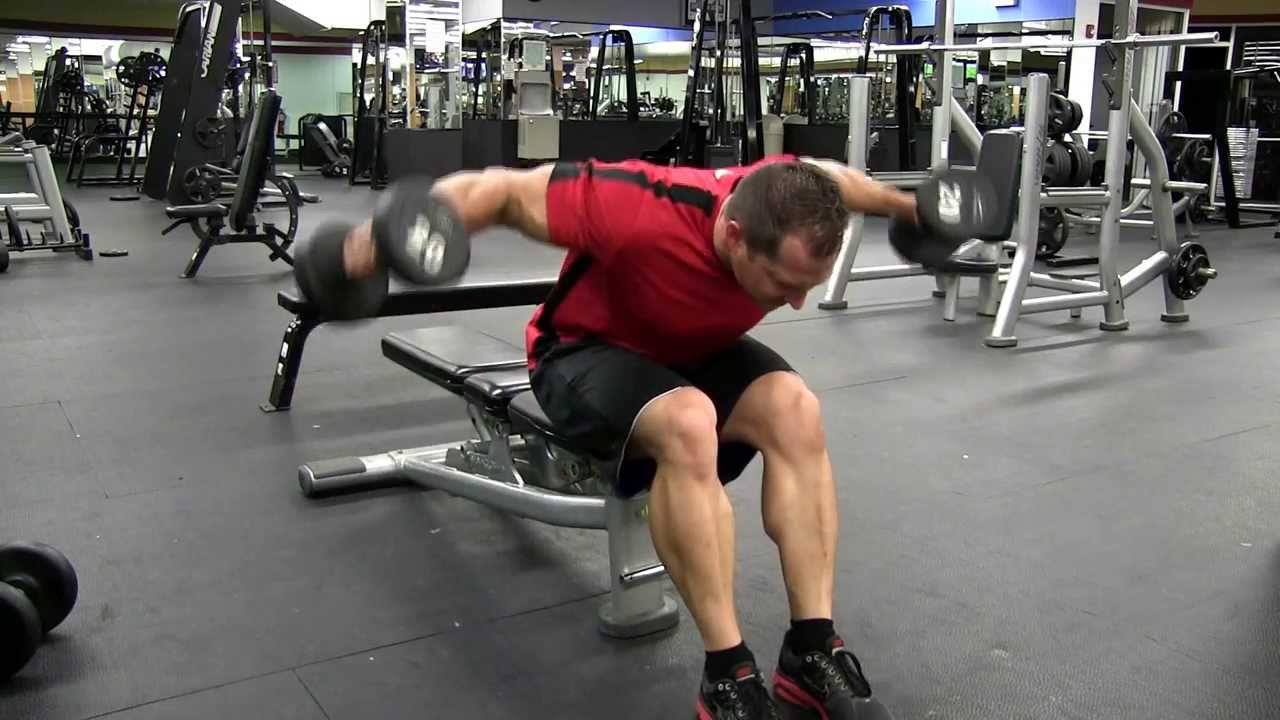
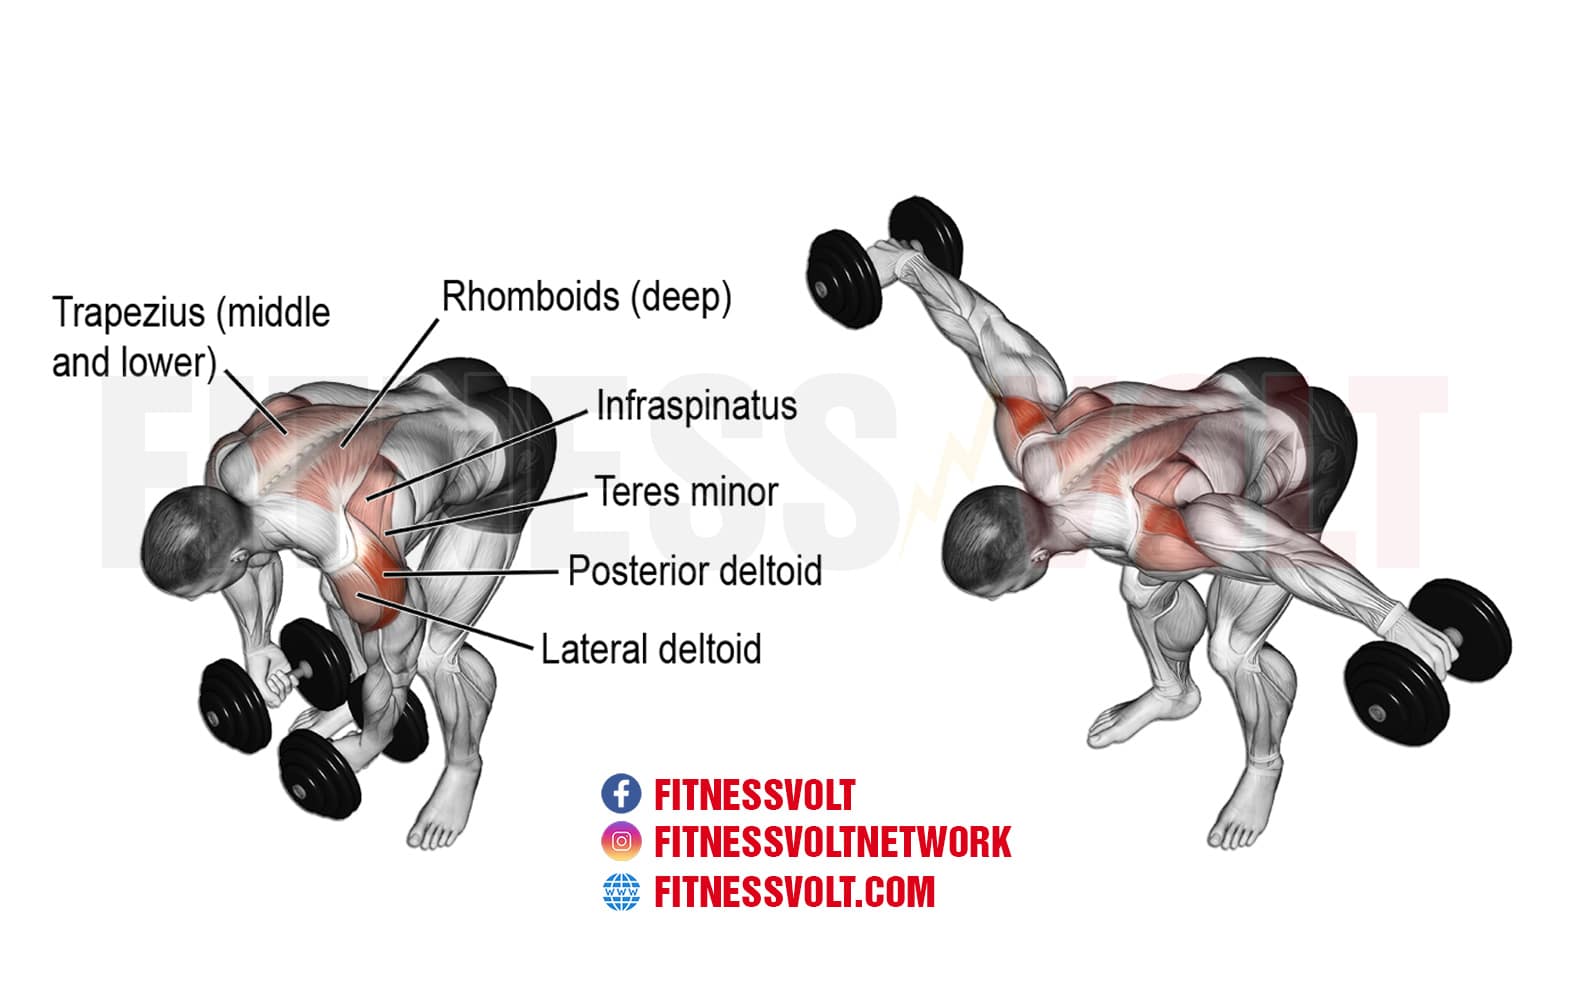
The rear delt fly with dumbbells is an effective exercise for targeting the rear deltoid muscles, which are located at the back of the shoulders. These muscles are important for shoulder stability and posture. This exercise can be done with dumbbells and is suitable for people of all fitness levels.

How To Do The Rear Delt Fly With Dumbbells
To perform the rear delt fly with dumbbells, follow these steps:
- Stand with your feet shoulder-width apart and hold a dumbbell in each hand.
- Bend your knees slightly and hinge forward at the hips to bring your torso parallel to the floor.
- Engage your core and keep your back straight.
- Extend your arms straight down towards the floor with the dumbbells in hand.
- Slowly lift the dumbbells out to the side, keeping your elbows slightly bent, until your arms are parallel to the floor.
- Pause for a moment, then slowly lower the dumbbells back down to the starting position.
- Repeat for several repetitions.
Variations Of The Rear Delt Fly With Dumbbells
There are several variations of the rear delt fly with dumbbells that you can try to target different areas of the shoulders:
- Reverse fly: This variation involves lifting the dumbbells straight back behind you instead of out to the sides.
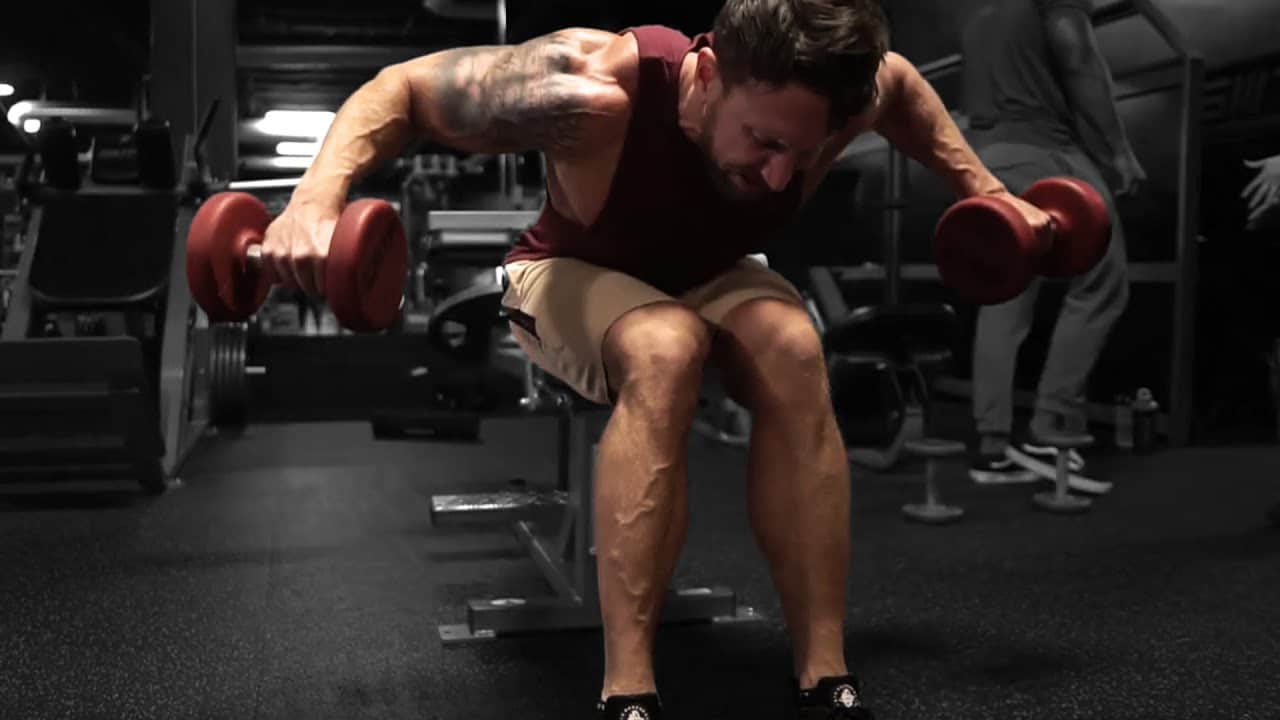
- Seated rear delt fly: This variation involves sitting on a bench and leaning forward to perform the exercise.
- Single-arm rear delt fly: This variation involves performing the exercise with one arm at a time.
Tips For Doing The Rear Delt Fly With Dumbbells
Here are some tips to help you perform the rear delt fly with dumbbells correctly:
- Start with light weights to avoid injury and gradually increase the weight as you become stronger.
- Keep your elbows slightly bent throughout the exercise to avoid strain on your joints.
- Focus on squeezing your shoulder blades together as you lift the dumbbells.
- Keep your core engaged and your back straight throughout the exercise.
- Breathe in as you lower the dumbbells and breathe out as you lift them.
Benefits Of The Rear Delt Fly With Dumbbells
The rear delt fly with dumbbells has several benefits:
- Strengthens the rear deltoid muscles, which are important for shoulder stability and posture.
- Improves shoulder mobility and flexibility.
- Can help prevent shoulder injuries.
- Can improve overall upper body strength.
Conclusion
The rear delt fly with dumbbells is a simple but effective exercise for targeting the rear deltoid muscles. By following the correct form and technique, you can strengthen these muscles, improve shoulder stability and posture, and prevent injuries. Remember to start with light weights and gradually increase the weight as you become stronger.
Related video of Rear Delt Fly With Dumbbells
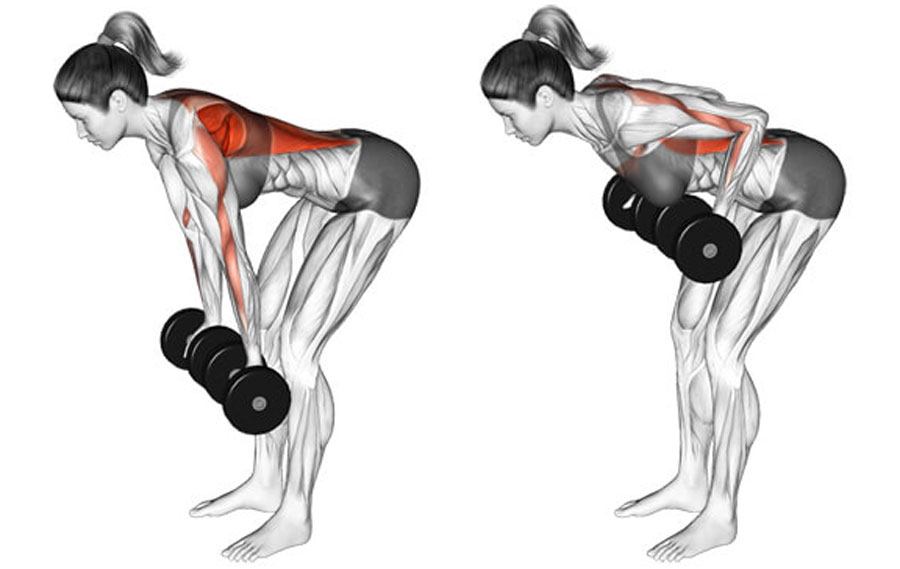
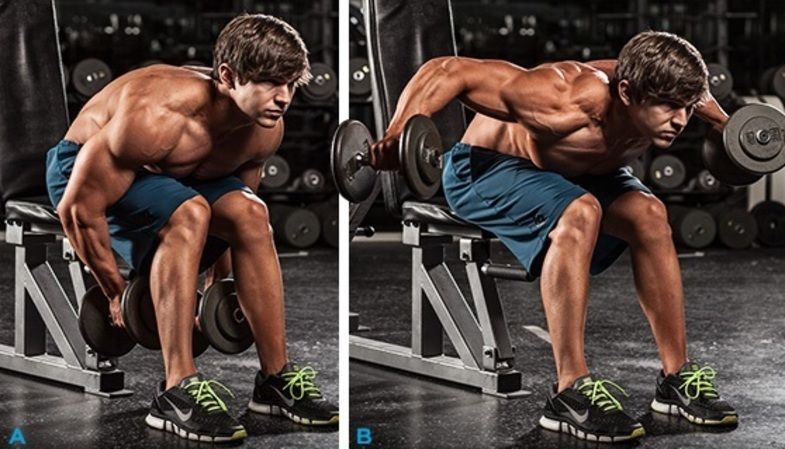
The Dumbbell Bent Over Raise is an exercise that is designed to strengthen and tone the muscles in your back, shoulders, and arms. This exercise is perfect for people who are looking to build upper body strength, improve their posture, and increase their range of motion. In this article, we will provide you with a complete guide on how to perform the Dumbbell Bent Over Raise and the benefits of this exercise.
How to Perform the Dumbbell Bent Over Raise

To perform the Dumbbell Bent Over Raise, you will need a set of dumbbells. Here are the steps to follow:
- Stand with your feet shoulder-width apart and hold a dumbbell in each hand.
- Bend your knees slightly and hinge forward at your hips, keeping your back straight and your abs engaged.
- Bring the dumbbells up to your chest, with your elbows pointing out to the sides.
- Slowly raise the dumbbells up and out to the sides, keeping your elbows straight but not locked.
- Pause at the top of the movement, and then slowly lower the dumbbells back down to the starting position.
Repeat the exercise for 10-12 repetitions and 2-3 sets.
Tips for Performing the Dumbbell Bent Over Raise

Here are some tips to help you perform the Dumbbell Bent Over Raise effectively:
- Choose dumbbells that are appropriate for your fitness level.
- Keep your back straight and your core engaged throughout the exercise.
- Don't lock your elbows when lifting the dumbbells.
- Focus on raising the dumbbells with your shoulders, not your arms.
- Use a controlled motion when lifting and lowering the dumbbells.
The Benefits of Dumbbell Bent Over Raise

The Dumbbell Bent Over Raise offers several benefits, including:
- Strengthening the muscles in your back, shoulders, and arms.
- Improving your posture and reducing the risk of back pain.
- Increasing your range of motion in your shoulders.
- Helping you build upper body strength and tone your muscles.
When to Incorporate Dumbbell Bent Over Raise into Your Workout Routine
The Dumbbell Bent Over Raise is a great exercise to incorporate into your upper body workout routine. You can perform this exercise on its own or as part of a circuit. Here are some ideas on when to incorporate the Dumbbell Bent Over Raise into your workout routine:
- As part of an upper body workout
- As a warm-up exercise before performing other upper body exercises
- As part of a circuit training workout
Conclusion
The Dumbbell Bent Over Raise is a great exercise to help you build upper body strength, improve your posture, and increase your range of motion. By following the steps and tips provided in this article, you can perform this exercise effectively and safely. Incorporate the Dumbbell Bent Over Raise into your workout routine to see the benefits for yourself.
Related video of Dumbbell Bent Over Raise: A Complete Guide
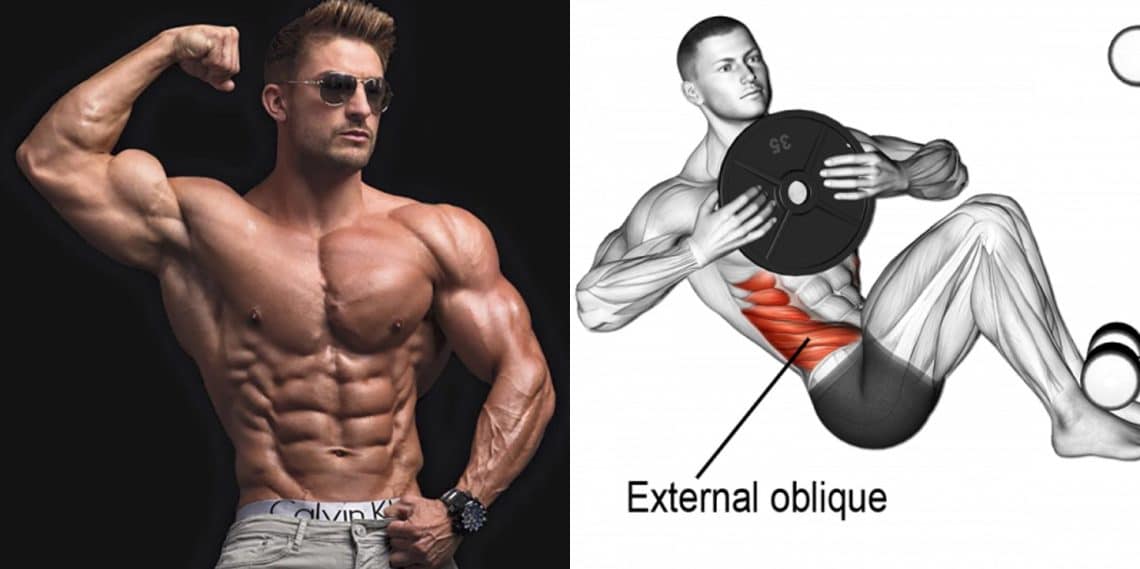
If you're looking for an effective way to target your abs and obliques, the Russian twist is a great exercise to add to your routine. But what muscles does the Russian twist work, exactly? In this article, we'll break down the specific muscle groups that are targeted during this exercise.
The Muscles Involved in the Russian Twist
The Russian twist primarily targets your rectus abdominis, which is the muscle that runs down the center of your stomach and is responsible for flexing your spine. However, this exercise also engages your obliques, which are the muscles on the sides of your abs that help with rotation and lateral flexion.

Additionally, the Russian twist can also work your hip flexors, which are the muscles that help lift your legs and stabilize your pelvis. This is because the exercise requires you to keep your legs elevated off the ground throughout the movement.
How to Perform the Russian Twist
To perform the Russian twist, follow these steps:
- Start by sitting on the ground with your knees bent and your feet flat on the floor.
- Lean back slightly and lift your feet off the ground, keeping your knees bent.
- Hold a weight or medicine ball in front of your chest with both hands.
- Rotate your torso to one side, bringing the weight with you.
- Pause briefly at the end of the twist, then rotate to the other side.
- Repeat for the desired number of reps.

It's important to maintain good form throughout the exercise to avoid injury and ensure that you're targeting the correct muscle groups. Keep your abs engaged and your back straight, and focus on rotating from your core rather than just swinging your arms.
Variations of the Russian Twist
There are several variations of the Russian twist that you can try to target different muscle groups or add more challenge to the exercise. Here are a few examples:
- Weighted Russian Twist: Hold a weight or medicine ball in front of your chest to increase the resistance.
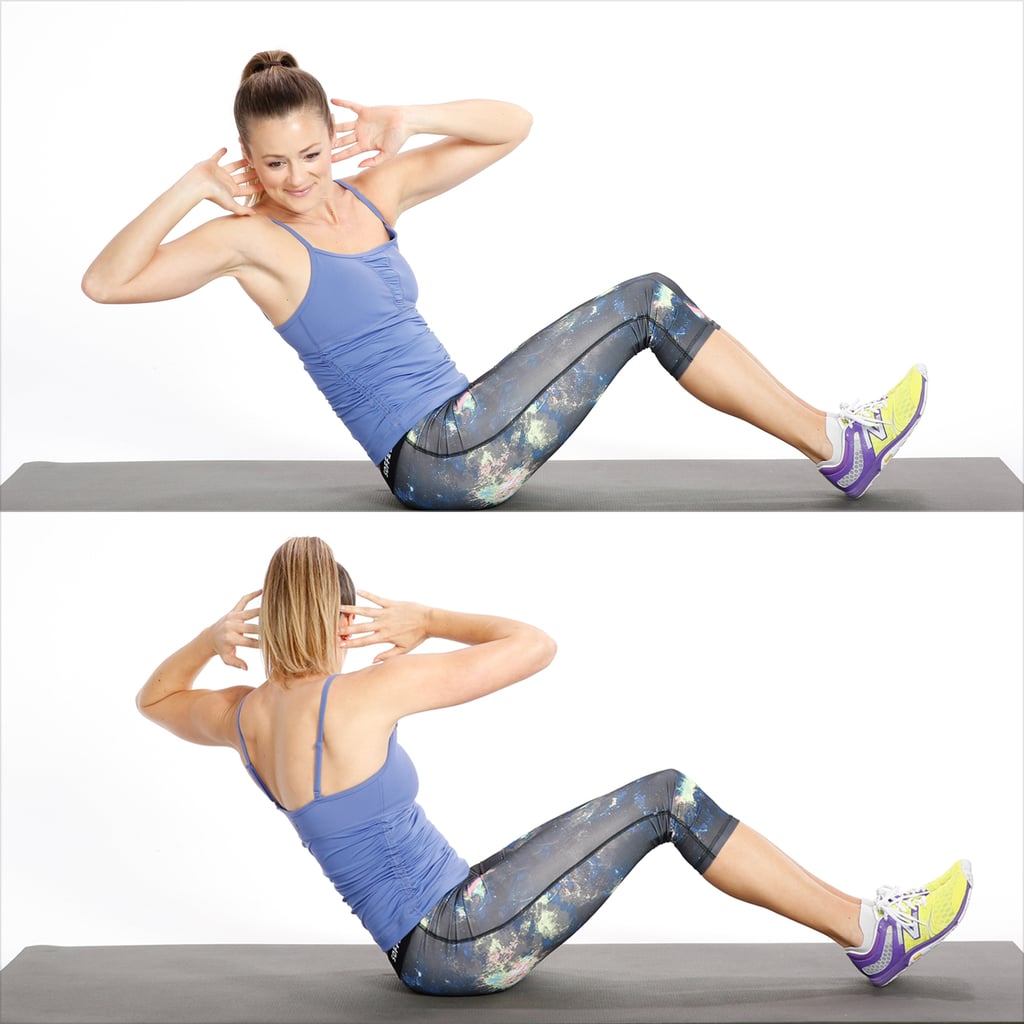
- Twisting Sit-Up: Add a full sit-up to the end of each twist to target your entire core.
- Single-Leg Russian Twist: Keep one leg extended while you twist to engage your hip flexors and add more stability work.
Incorporating the Russian Twist into Your Workout
The Russian twist can be a great addition to your core workout routine, but it's important to use proper form and start with a weight that you can handle comfortably. Aim for 2-3 sets of 10-15 reps, and increase the weight or reps as you get stronger.
Remember to also incorporate other core exercises into your routine to target all of your abdominal muscles and avoid overworking any one area. Planks, crunches, and bicycle crunches are all great options that can be combined with the Russian twist for a full core workout.
Conclusion
The Russian twist is a highly effective exercise for targeting your abs, obliques, and hip flexors. By adding this exercise to your routine and using proper form, you can strengthen your core and improve your overall fitness.
Related video of Russian Twist Muscles Worked

The hip is an important joint that connects the lower limb and the pelvis. It is responsible for supporting the weight of the body and facilitating movement of the lower limb. The muscles in the hip play a crucial role in this process, especially those involved in internal rotation. This article will discuss the internal rotation muscles of the hip, their function and how to strengthen them.
What are the Internal Rotation Muscles of the Hip?

The internal rotation muscles of the hip are a group of muscles that work together to rotate the thigh bone (femur) inwards towards the midline of the body. These muscles include the gluteus medius, gluteus minimus, tensor fasciae latae, and the anterior fibers of the gluteus maximus.
Function of Internal Rotation Muscles of the Hip

The internal rotation muscles of the hip are important for several reasons. First, they help to stabilize the hip joint, which is important for maintaining balance and preventing injury. They also play a role in controlling the movement of the pelvis during activities such as walking, running, and jumping. In addition, these muscles are involved in the initiation of rotational movements of the lower limb, such as pivoting or turning.
Common Causes of Weak Internal Rotation Muscles

Weak internal rotation muscles of the hip can be caused by a number of factors. Sedentary lifestyles, injuries, and postural imbalances are among the most common. Prolonged sitting can also lead to tightness in the hip flexors, which can inhibit the function of the internal rotation muscles.
Exercises to Strengthen Internal Rotation Muscles

Strengthening the internal rotation muscles of the hip can help improve mobility, balance, and overall function of the lower limb. The following exercises can be performed to target these muscles:
- Clamshells: Lie on your side with your knees bent and feet together. Keeping your feet touching, lift your top knee up towards the ceiling while keeping your heels touching.
- Bridges with a resistance band: Place a resistance band around your thighs, just above your knees. Lie on your back with your knees bent and feet flat on the floor. Lift your hips up towards the ceiling while pushing your knees out against the resistance band.
- Internal rotation with a resistance band: Sit on a chair with a resistance band looped around your knees. Keeping your feet flat on the floor, rotate your knees inwards against the resistance band.
- Lateral band walks: Place a resistance band around your ankles. Take small steps sideways while keeping tension on the band.
Conclusion
The internal rotation muscles of the hip are important for maintaining balance, controlling movement, and preventing injury. Weakness in these muscles can lead to a variety of problems, but they can be strengthened through targeted exercises. If you are experiencing hip pain or discomfort, it is important to consult with a healthcare professional before beginning any exercise program.
Related video of Internal Rotation Muscles Hip

Back pain is a common problem for many people across the world, and it can be caused by various factors such as poor posture, stress, or injury. If you're one of those who suffer from back pain, you know how debilitating it can be. It can affect your daily activities, your mood, and your overall quality of life. Fortunately, there are exercises that you can do to alleviate your back pain, and one of them is the Cat and Camel Exercise.
What is the Cat and Camel Exercise?

The Cat and Camel Exercise is a simple stretching exercise that targets your lower back muscles. It involves arching your back (like a cat) and then lowering it down (like a camel). The movement helps to increase the flexibility of your spine and relieve tension in your back muscles.
How to Do the Cat and Camel Exercise

Here are the steps to do the Cat and Camel Exercise:
- Start on your hands and knees, with your hands shoulder-width apart and your knees hip-width apart.
- Make sure your wrists are directly under your shoulders and your knees are directly under your hips.
- Take a deep breath in and arch your back like a cat, by tucking your chin into your chest and pulling your belly button towards your spine.
- Hold this position for a few seconds.
- Exhale and lower your back down like a camel, by lifting your head up, dropping your belly towards the floor, and extending your spine.
- Hold this position for a few seconds.
- Repeat the sequence for 10-15 times.
Benefits of the Cat and Camel Exercise

The Cat and Camel Exercise offers several benefits:
- Relieves tension in your back muscles
- Increases the flexibility of your spine
- Improves your posture
- Reduces the risk of back injury
- Stimulates your digestive system
Precautions When Doing the Cat and Camel Exercise

While the Cat and Camel Exercise is generally safe for most people, there are some precautions that you need to take:
- Consult your doctor before doing this exercise if you have a history of back problems or injuries.
- Avoid doing this exercise if you have severe back pain or a herniated disc.
- Start slowly and gradually increase the intensity of the exercise over time.
- Don't over-arch your back or push yourself too hard.
- If you feel any pain or discomfort, stop the exercise immediately.
Conclusion
The Cat and Camel Exercise is a simple yet effective way to alleviate your back pain and improve your overall health. By incorporating this exercise into your daily routine, you can increase the flexibility of your spine, reduce tension in your back muscles, and improve your posture. However, it's important to take precautions, start slowly, and listen to your body. With regular practice, you'll feel the benefits of this exercise in no time!
Related video of Cat and Camel Exercise: The Ultimate Solution to Your Back Pain
If you're looking to strengthen and tone your thighs, hamstrings and glutes, then rolling out your quads is a great way to do it. Rolling out your quads is a form of self-myofascial release, which is a type of self-massage that helps to release tension and tightness in your muscles. It's a simple and effective technique that you can easily do at home with a foam roller.
What You Will Need
To roll out your quads, you will need a foam roller. Foam rollers come in different densities and sizes, but a medium-density foam roller is a good choice for beginners. You will also need a comfortable and flat surface to lie on, such as a yoga mat or carpeted floor.
Step-by-Step Guide

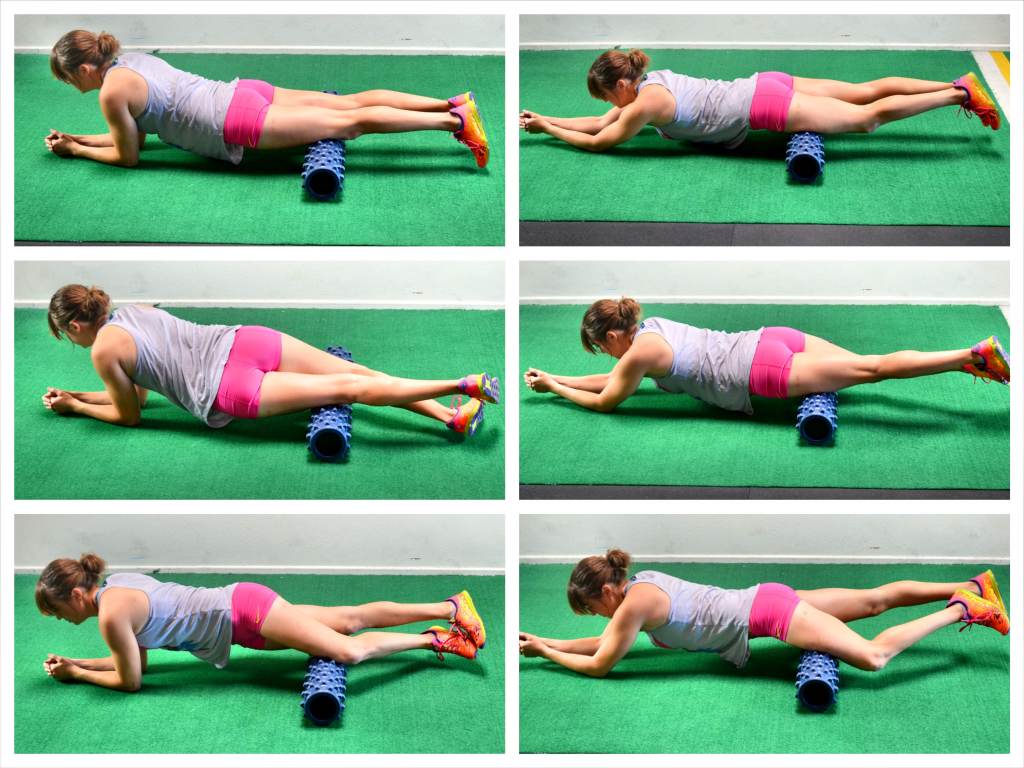
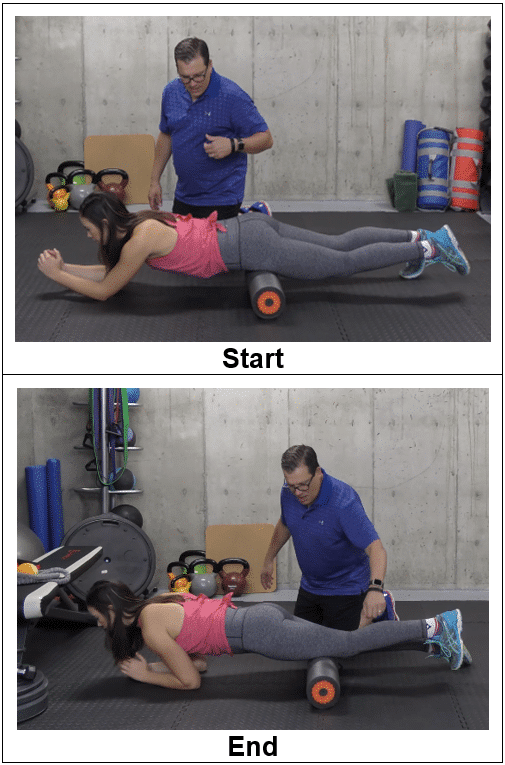
Here's how to roll out your quads:
- Lie face down on the foam roller with the roller under your quads.
- Place your forearms on the ground for support.
- Slowly roll up and down your quads from your knees to your hips.
- If you find a tight or sore spot, pause and hold that position for 10-30 seconds.
- Continue rolling up and down your quads for 1-2 minutes.
- Switch sides and repeat.
Tips for Success

Here are some tips to keep in mind as you roll out your quads:
- Start with a medium-density foam roller and progress to a firmer one as your muscles adapt.
- Roll out your quads after a workout or at the end of the day when your muscles are warm.
- Don't roll over bony areas, such as your knees.
- Breathe deeply and slowly as you roll to help relax your muscles.
- Drink plenty of water after rolling to help flush out toxins.
Benefits of Rolling Out Your Quads

Rolling out your quads has several benefits:
- Relieves muscle tension and tightness.
- Improves blood flow to your muscles, which helps to reduce soreness and aid in recovery.
- Increases flexibility and range of motion in your legs.
- Helps to prevent injuries by keeping your muscles loose and limber.
- Enhances performance by improving your muscle function and power output.
Conclusion
Rolling out your quads is a simple and effective way to improve the health and function of your leg muscles. By using a foam roller to release tension and tightness, you can improve your flexibility, reduce your risk of injury, and enhance your overall performance. So, grab a foam roller and give it a try!
Related video of How To Roll Out Quads

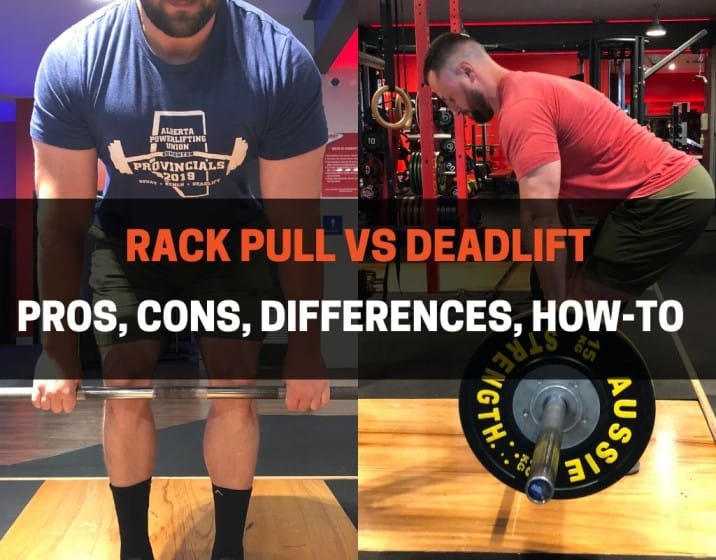
When it comes to building strength and muscle mass in the lower body, deadlifts and rack pulls are two of the most popular exercises. Both exercises target the same muscle groups, but there are some key differences between them. In this article, we will compare rack pulls vs deadlifts and help you decide which exercise is best for you.
What are Rack Pulls?
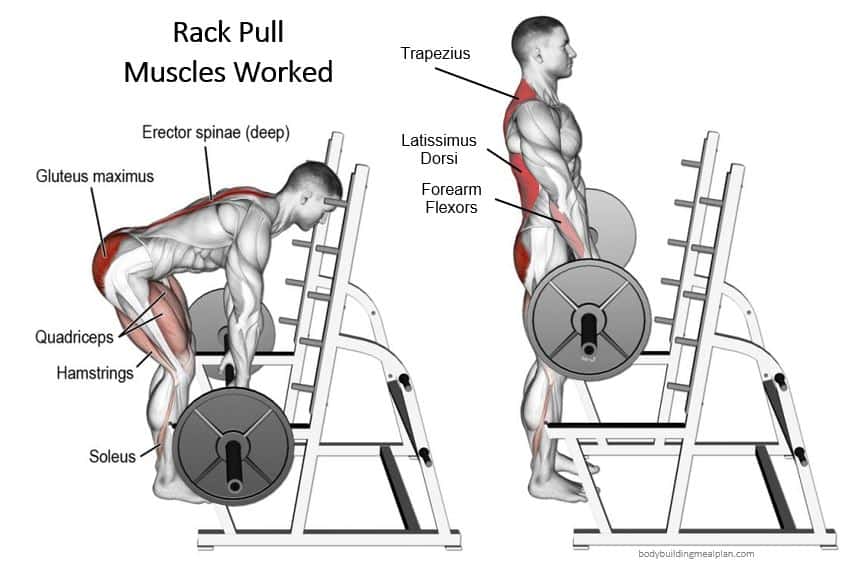
Rack pulls are a variation of the deadlift that involve lifting the weight from a rack rather than from the floor. In this exercise, the bar is set at a height that is higher than the floor and the lifter pulls the weight from this elevated position. Rack pulls can be performed with heavy weights, making them an excellent exercise for building strength in the lower back, glutes, and hamstrings.
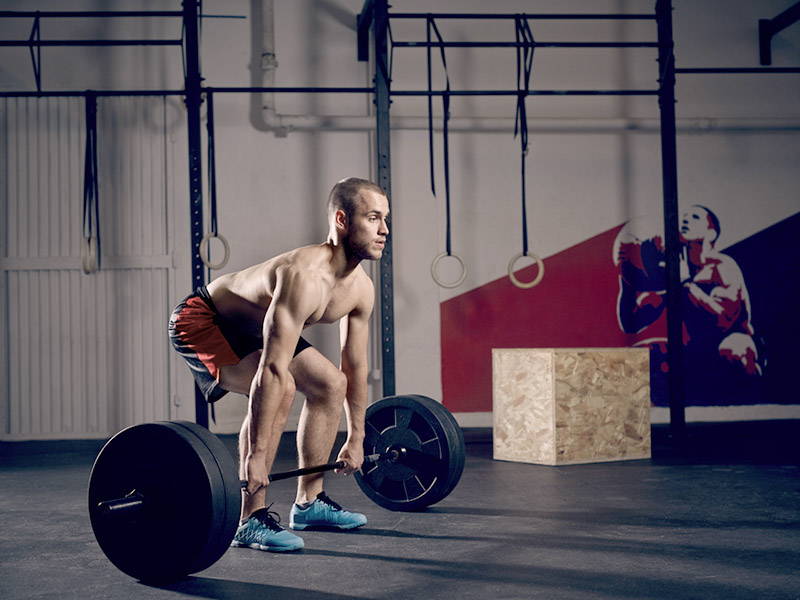
What are Deadlifts?
Deadlifts are a compound exercise that targets multiple muscle groups, including the lower back, glutes, hamstrings, and quadriceps. In this exercise, the lifter stands in front of the bar with feet shoulder-width apart and lifts the weight from the floor using a hip hinge movement. Deadlifts are often considered the king of exercises for building total body strength and are a staple in many strength training programs.
The Differences Between Rack Pulls and Deadlifts
The main difference between rack pulls and deadlifts is the starting position. Rack pulls start from an elevated position, whereas deadlifts start from the floor. This difference affects the range of motion and the muscles worked. Rack pulls target the upper portion of the lift, while deadlifts work the entire lift from the floor to lockout. Deadlifts also involve more hip and knee flexion, making them a more comprehensive exercise for the lower body.
The Benefits of Rack Pulls

Rack pulls are an excellent exercise for building strength in the upper back, lower back, glutes, and hamstrings. They can be performed with heavy weights, making them an effective exercise for building total body strength. Rack pulls are also a great exercise for improving grip strength and can be used to target specific areas of weakness in the deadlift.
The Benefits of Deadlifts

Deadlifts are one of the best exercises for building total body strength and muscle mass. They work the entire body, including the upper and lower back, glutes, hamstrings, and quadriceps. Deadlifts also improve overall athletic performance by increasing power, speed, and explosiveness. They are a functional exercise that translates to real-life movements and can help prevent injury by strengthening the muscles and joints.
How to Perform Rack Pulls

To perform rack pulls, set the bar at a height that is higher than the floor but below knee level. Stand with feet shoulder-width apart and grip the bar with an overhand or mixed grip. Brace your core and lift the weight using your lower back, glutes, and hamstrings. Keep your shoulders back and down and maintain a neutral spine throughout the lift. Lower the weight back down to the rack and repeat for the desired number of reps.
How to Perform Deadlifts

To perform deadlifts, stand in front of the bar with feet shoulder-width apart. Bend down and grip the bar with an overhand or mixed grip. Brace your core and lift the weight using a hip hinge movement. Keep your shoulders back and down and maintain a neutral spine throughout the lift. Lock out at the top of the lift and lower the weight back down to the floor. Repeat for the desired number of reps.
Which Exercise is Best for You?
The best exercise for you depends on your goals and fitness level. If you are a beginner or have limited mobility, rack pulls may be a better option as they start from an elevated position and require less hip and knee flexion. If you are looking to build total body strength and muscle mass, deadlifts are the superior exercise. Both exercises can be incorporated into a well-rounded strength training program to target different areas of the body.
Conclusion
Rack pulls and deadlifts are both effective exercises for building lower body strength and muscle mass. The main difference between them is the starting position, which affects the range of motion and muscles worked. Rack pulls target the upper portion of the lift, while deadlifts work the entire lift from the floor to lockout. Both exercises have their benefits and can be incorporated into a well-rounded strength training program. Choose the exercise that best suits your goals and fitness level.